
It’s now time to add that second 18TB drive to the single drive UnRAID system now housed, cuckoo-wise, in the QNAP TS-451. The very comprehensive, no-nonsense UnRAID Web interface that displays in my browser when I visit the NAS’s URL describes the current set-up as “an array of one device”. We’re about to turn that into an array of two devices.
That Web interface, by the way, is a huge selling point for UnRAID. More on this below.
So, with a second 18TB drive we’re doubling the capacity, right? No. Our 18TB UnRAID NAS will remain an 18TB UnRAID NAS. The new drive is going to be a parity drive, only there to help maintain the integrity of the first drive, our data drive.
So we’re doubling the cost of storage just to make sure that a well-warrantied IronWolf Pro drive, a drive that Seagate promises to recover data from at no cost should it fail in the first three years of use, doesn’t let us down? Belt and braces, or what?
There’s more to it than that.
Although it’s perfectly possible to run an UnRAID NAS as “just a bunch of drives” (JBOD), UnRAID’s unique selling proposition is the additional integrity offered by the inclusion of a parity drive. This single parity drive won’t just be ensuring the integrity of the one data drive we currently have running. As we add two more drives to the system (the TS-451 maxes out at four drives in total), all three of those drives can be covered by that one parity drive. And, hardware allowing, that parity drive would also be able to watch over any further drive expansion.
But now let’s unwrap that new drive and discuss what’s going on.
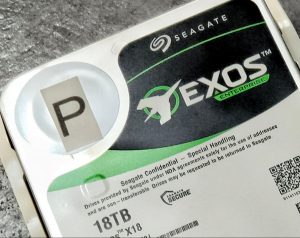
Unlike the IronWolf Pros, the Exos comes with a caveat that Seagate might want this one back.
ALTHOUGH IT HAS THE SAME 18TB capacity as the data drive, this parity drive isn’t an IronWolf Pro. Seagate has donated a pair of IronWolf Pros to our project but we’re reserving the second one for data, as we’ll be discussing in the next part of our story. The new parity drive is an Exos Enterprise NAS drive.
If that sounds a touch grander than the IronWolf Pro, yes, in a sense it is. Physically they’re very similar: the same robust construction designed for an uneventful life of hard work for at least five years, the same sealed case filled with helium gas instead of air, offering near frictionless flight as the read-write heads skim over the surface of the closely packed nine platters.
One noticeable difference in the specifications is the MTBF (mean time between failures). The IronWolf Pro has an MTBF rating of 1,200,000 hours against the Exos 2,500,000 hours. It’s not likely this difference will emerge during the course of this series, or even in my remaining lifetime. But in practical terms, it’s a key factor illustrating the difference between the two markets each model is aimed at.
These are all 24/7 drives (as the industry likes to call them—24 hours a day, 7 days a week), but the IronWolfs are intended for small and medium business (SMB) NAS use where the 3-year data recovery warranty is likely to be useful. The Exos drives are covered by the same 5-year replacement warranty, but there’s no data recovery deal, the presumption being that the enterprise-class market for these drives will have broader insurance arrangements.
Physically, there’s hardly any difference between the two types: both versions turn at 7200 revolutions per minute (rpm), have on-board cache memory of 256MB to buffer reads and writes. But tucked away in the very detailed spec sheet of the Exos is a factor you won’t find among the IronWolf Pro specs. It’s something called “Superparity”.
 Parity is the theme of this chapter and we’re going to go into it in some detail later. For now, it’s enough to know that its a form of error-correcting code (ECC) that makes sure the bits storing the data don’t go astray. When your data are just a string of ones and zeros, a zero that accidentally flips to a one or vice versa can really hang you up the most.
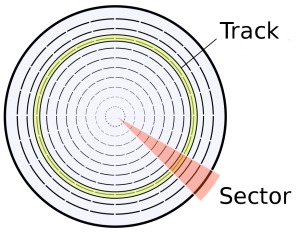
Regular parity presses an extra, unused bit into service, to watch over a number of other bits. Typically, a drive will use ECC to guard each individual sector. A sector is one section of one of the concentric tracks magnetically defined on the platter by the read/write head.
“Superparity” is no doubt an invention of Seagate’s marketing department. But it describes a genuinely useful addition to standard drive integrity. I understand from Seagate’s engineers that Superparity is an extra parity checksum embracing all the sectors on any given track simultaneously. If the drive needs to do error correction, the Superparity helps out with additional information.
In practical terms, Superparity stumbles on only one uncorrectable bit per 125TBs of writes. This will be what accounts for the difference in MTBF ratings between this drive and the IronWolf Pro.
The Parity Drive Goes To Work
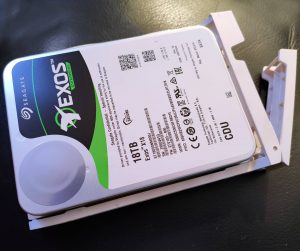 I use two screws to attach the new Exos to the TS-451 drive caddy and slide it into position. No wiring is involved: with a satisfying click, locking the caddy plugs the power and data pins at the rear of the drive directly into the enclosure’s corresponding SATA sockets. They’re mounted on a daughterboard that runs behind the four caddy compartments and in turn plugs into the PCIe bus on the motherboard.
The drive appears on the UnRAID Dashboard, which asks me what I’d like to do with it. Two logical drive slots are available for the parity drive and I assign it to parity slot 1. If the collection of drives in an UnRAID array gets big, or the administrator gets nervous, that second parity drive slot allows for additional integrity. Any second parity drive won’t just be a mirror of the first. It calculates parity differently.
For now, that one parity drive should be as much as we need. It’s time to let it go to work.
Doing what?
There’s a detailed explanation in the UnRAID Wiki. But we can take a break here to discuss this as the job is going to take around 24 hours, the UnRAID Dashboard tells me.
The software running this parity drive setup operation has no interest in the information on the data drive. It’s just inspecting what’s there as a string of bits—not seeing the wood for the trees, if you like. It does a very simple calculation on each bit as it reads them one by one.
This operation is designed to calculate parity across n drives. But our present case, where n=1, gives us an unusual, interesting result, as we’ll see.
Setting even parity means that for every bit on the data drive, the software will lay down an equivalent bit, a one or a zero, such that the total of the two bits will be even. So in this case, where there’s only one drive to create parity against, for every bit on the data drive that is a one, the corresponding bit on the parity drive will be flipped to one (1+1=2, which is even). And for every bit on the data drive that is a zero, a zero will be laid down on the parity drive (the assumption being that zero is an even number).
It’s not hard to see that in this case, the parity drive will end up as a mirror of the data drive. This implies that I could remove the data drive and still access any of its data, simply by reading the parity drive. And, indeed, that’s the case.
It’s useful to understand this simple 1 data drive + 1 parity drive scenario to get a handle on how parity works. But what happens when you have a pair of data drives with just a single parity drive? In this case, neither of the data drives is mirrored onto the parity drive. Can you still remove one of the parity drives and get back all the data that were on it?
Yes, you can.

We’ve lost a bit. But the parity bit knows how to fix this.
The system will have to spin up the remaining data drive. By reading that drive bit by bit and checking each bit against the parity information it has for that bit, it can reconstruct the bit that would have been on the missing drive. This will also be the case no matter how many drives are in the system. If one is removed, or fails, as long at the remaining drives faithfully report the status of every one of their bits, the missing or failed drive can be completely reconstructed.
You might take “reconstructed” to mean that all the data can be completely restored onto a replacement drive. They can, and this is most likely what you’d want to do. But even if you don’t have a second drive, with the cooperation of the parity drive and the other drives in the array, the data are still completely reconstructed into a “ghost drive” that behaves exactly as if the missing drive were present. However, this negates any parity protection across the array, so you would want to get that replacement drive installed ASAP.
While We Wait, Let’s Look Around
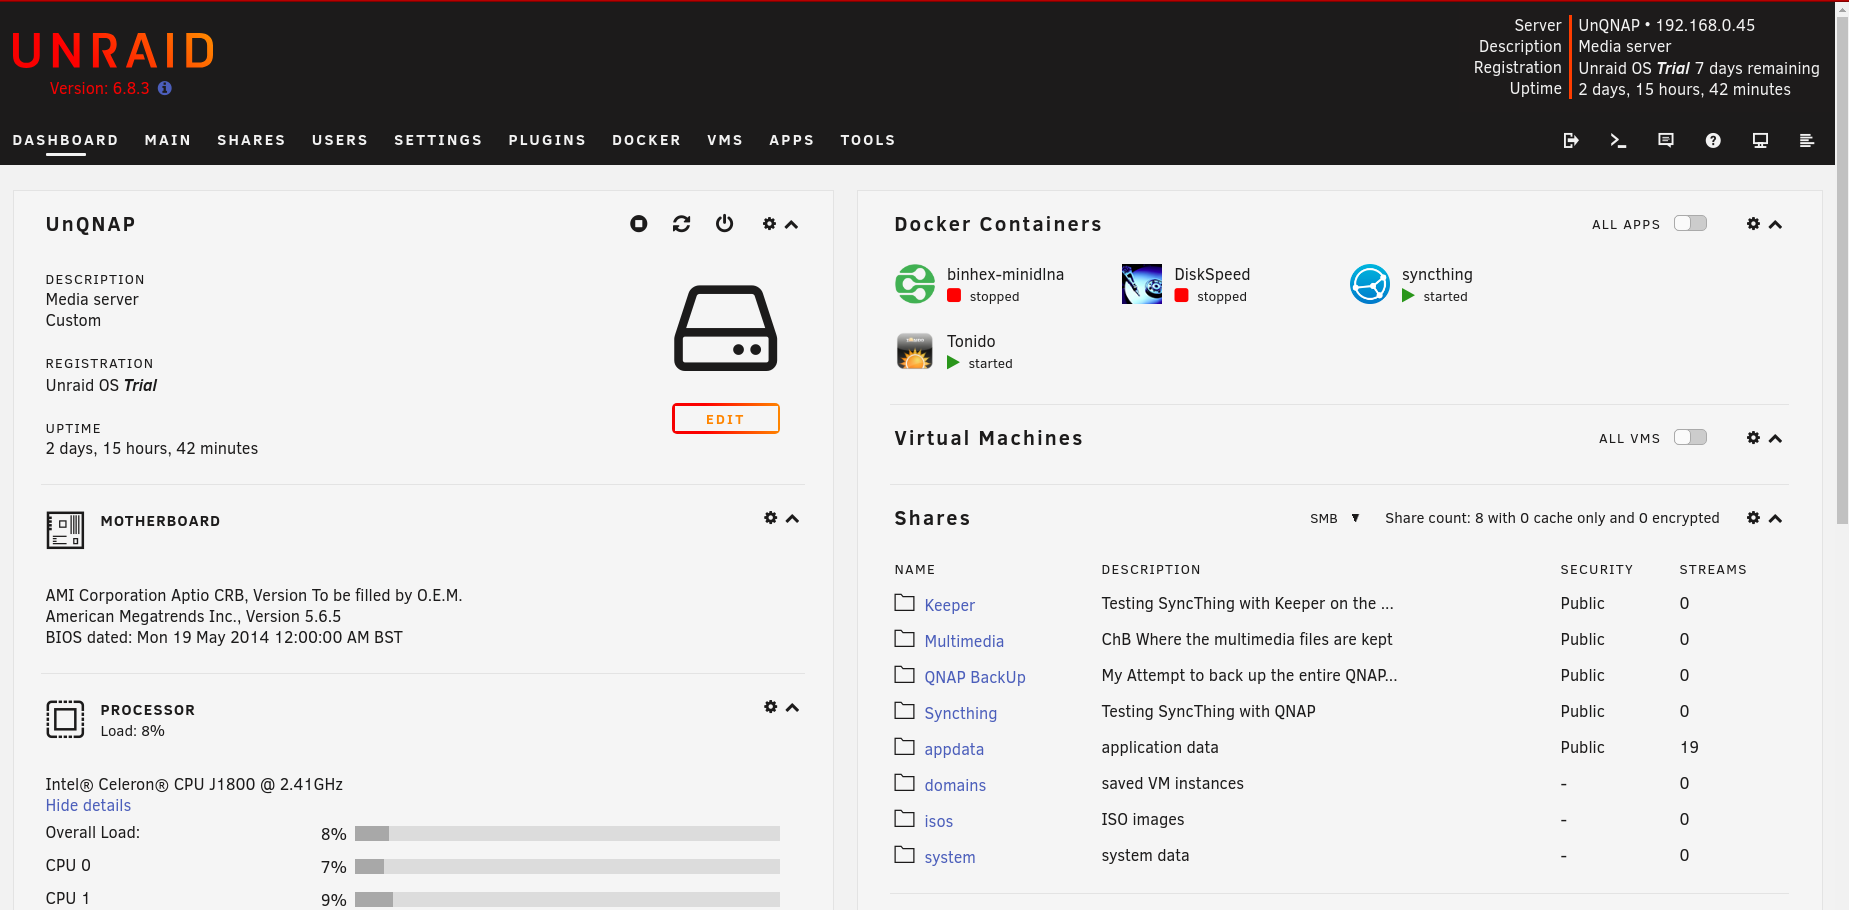
This Web user interface (WebUI) that keeps you in touch with the UnRAID NAS across the LAN, is comprehensively filled with information about what’s going on in the system in real time. I nearly wrote “crammed full” but there’s no sense at all of anything being squeezed in. Arguably, it’s not designed as a nursery slope for the beginner. But it’s consistently laid out in a way that invites you to learn how to understand it.
Once you know where to look, it’s all there. On the first tab, the Dashboard, you’ll find the full hardware specs, and real-time information about uptime, processor and memory load, and current shares.
Other tabs show you the make, model and serial numbers of all the drives, details of running processes, a list of all the directories being shared across the network together with their current sizes and permissions. And more.
One thing that QNAP users will initially find missing, however, is a tab on the UnRAID Dashboard offering apps to load into the system. QNAP provides dozens of these. The UnRAID Dashboard does have a tab labelled PLUGINS, though, which turns out to be a portal to a plethora of UnRAID apps once you’ve loaded a plugin called Community Applications, subtitled “The One Stop Shop for all applications for UnRaid”.
You’ll notice that an APPS tab is present on my WebUI. Community Applications (CA for short) was the one plugin I had to load to get to the Diskspeed app we covered in the previous chapter.
What’s CA All About?

The UnRAID Community Apps Logo
Why aren’t these apps featured up front? There’s a very good reason for this that the UnRAID beginner needs to understand thoroughly.
UnRAID is proprietary middleware running on top of an open source operating system, Slackware Linux. The UnRAID you buy with your licence fee is just the middleware. Lime Technologies takes responsibility for the integrity of what’s running underneath it (unless you choose to modify this, as you’re perfectly free to do). But apps running on top of UnRAID, all developed by UnRAID users, the Community, aren’t covered by the deal with Lime Technology.
This is very different from the QNAP ecosystem. QNAP does have third party and “community” developers but there is also a large core of official apps that QNAP develops and maintains itself, many of them free of charge, some requiring a licence fee. This last point is particularly important in the current climate of identity theft, computer viruses, surreptitious BitCoin mining and ransomware. QNAP stands by its official apps, maintains them diligently, with frequent updates to counter security threats.
The apps unleashed on the system through CA carry no such provenance. As with most open-source software, you’re on your own. Many of the apps offer Donate buttons, but that’s your choice and you get nothing special in return.
I don’t mean to put you off with this warning. The UnRAID ecosystem is swimming with valuable applications—many more than those offered by proprietary NAS systems—that you can add to UnRAID for no cost. Many of these are docker apps. But as I mentioned earlier, docker apps operate in a kind of bubble, largely isolated from the rest of the system. This means that any compromise to their integrity is likely to be contained.
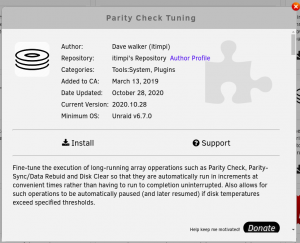 The best UnRAID apps are frequently maintained and often can be optionally self-updating. Maintainers like itimpi attach a changelog to the description of their app that, following best practice, chronicles development, with time and date stamps. Arguably you know more about the provenance and track record of apps like this than you can glean from most proprietary software.
CA has also opened the door to a couple of other basic features I felt were fundamental to the way I’d come to use the QNAP. Thanks to a docker wrapped around Tonido I can now share large files across the Internet. And Syncthing in another docker turns out to be a marvellous open source substitute for QNAP’s Hybrid Backup Sync for keeping pairs of folders synchronised across the LAN.
Now We’re Even
Today’s very high capacity drives certainly help to reduce the price per GB. And they save on electricity too. But the inevitability of physics hits home when you’re doing these parity runs. Here we are, almost a whole day later with a parity drive that finally has every single data bit nailed down.
The good news is that the parity check process seemed in no way to affect the regular functions of the NAS. 1080p movies streamed smoothly off it while both drives were churning away. How efficiently this works for you, of course, will depend on the processor in your NAS. The TS-451 employs a two-core Intel Celeron J1800, a very modest laptop processor launched seven years ago which UnRAID seems to handle very efficiently.
Prasanna, my eBay contact who got me into switching to the QNAP hardware, has opted for a much more powerful processor in his new build. And this is probably what you should aim for if you’re going to use your UnRAID for a lot of apps and, particularly, for virtual machines (VMs). A Pentium-class processor and a lot of memory—UnRAID seems certainly to be worthy of this.
*You might also think (as I did) that writing to any one drive on the array would require them all to be spun up to keep the parity drive valid. But the parity drive already knows the parity of the idle drives and can leave them sleeping. Without consulting them, it will only flip a bit when a bit is flipped on the active drive being written to. Obvious, really, once I’d thought it through.
But the aim of this present Tested Technology project is to set up a device primarily for large storage with low power consumption. The ideal would be something like a modest version of a MAID system. MAID stands for Massive Array of Idle Drives, which you’re writing data to once and then only occasionally reading it back.
One advantage of UnRAID over RAID is the ability to spin down individual drives, only spinning them up again on demand*. Obviously, this makes for slower access, but it’s optional. And UnRAID can also share out data from drives outside the parity-protected array. So you won’t need a second NAS for functions that need maximum drive response.
Now We’re Even More Even
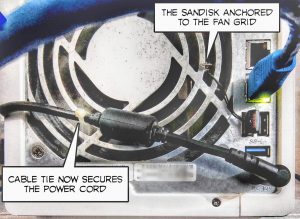
With the parity established and the TS-451 still running, I moved the machine round on its shelf to photograph the (well, I thought) ingenious simple arrangement I’d made at the rear. Having discovered I could dual boot the NAS into QNAP or UnRAID depending on whether the tiny SanDisk USB stick is plugged into that rear USB socket and fearful of misplacing the SanDisk, I’d… Well, you’ll see.
In shifting the TS-451 into position for a photoshoot, I unintentionally unplugged the power. Note to self: this is far too easy to do. The TS-451 uses an external power brick, connected to the machine by a not very tight fitting barrel plug. Something to watch out for in future.
Suddenly depriving a piece of IT equipment of power is never a good idea, particularly if spinning drives are involved. This happens to be UnRAID’s opinion too. When you power up an UnRAID machine after an unclean shut down while the array is spinning, the first thing it does is re-run its parity check.
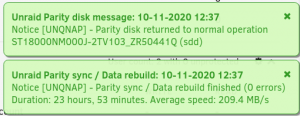
I’d only just installed the second drive and let it go through its 23 hour run to set up the parity. Now it was having to do it all over again.
Worth noting: this involves both drives going full lick for very nearly a whole day and night. Power usage more than doubles, to around 30W.
 Even so, the total power consumption over the whole parity run turns out to be less than half a kilowatt hour, costing about 7 pence. Of course, when we add more drives, all of the drives will need to spin up during a parity check or initial parity run. It will be interesting to see how that impacts on the energy cost.
Good news: This second parity run finished, again with 0 errors.
And I’ve now secured the power lead using a cable tie (see photo).
Coming Soon
The next step will be to add a second data drive. This is going to require another parity computation and I’ll be watching out for the power consumption during this.
This second drive addition opens up the opportunity to demonstrate another of UnRAID’s neat features. I’ll tell you about it in Chapter 3 if it works.
Well, I’ll tell you about it if it doesn’t work as well. Failed experiments are how you learn.
Chris Bidmead: 11-Nov-20