
The first two parts of this story introduced us to home-building a network server, a backward look over the shoulder at a very useful project I’d put together nine years ago.
Not one, but two servers, in fact. Each server has eight 3TB hard drives, which seemed more than you’d ever need back in 2011. Three eights are twenty-four and doubling that for the two servers gives us forty-eight.
Forty-eight terabytes.
But if you’ve read this far you’ll know by now my concern—all right, call it obsession—with data integrity. Even the most reliable drives will die eventually. Even the most reliable drives can’t guarantee that the odd byte may not be munged by a cosmic ray or simply be misread by some rare timing malfunction. And there goes your precious wedding photo.
So a good deal of those terabytes aren’t being used to store data. They’re storing data about the data—metadata that allows any munged bytes to be restored to their pristine condition. And as a belt and braces, all the information on the drives is duplicated in other places across the drives. And all the data in the main server is copied across to the other backup server.
Did I mention my concern with data integrity?
COMPLICATED? YOU MIGHT THINK SO—if you haven’t been following the story so far. Pretty well all this error checking and redundancy is automatically set up and maintained by the FreeNAS operating system. Or, more specifically, the ZFS filesystem it relies on.
There’s a price to pay, of course. Not for FreeNAS or ZFS—software that’s free to download and use (and modify, if you’re so inclined). The redundancy and error checking does, however, take a toll on your drive space. While each of my servers technically has twenty-four terabytes, this boils down to just sixteen terabytes of usable data space. But unusually reliable usable data space.
And unusually reliable usable data space that was by now, with the accumulation of nearly a decades-worth of data, mostly used up.
Playing the System
ZFS from the command line
We paid tribute in part 2 to the geniuses behind ZFS and their recognition that the necessary complexities of a self-healing filesystem would need to be logically simple for users and system administrators. And this is what they delivered.
But being Unix geeks, their idea of simplicity didn’t entirely match up with what the rest of us would call simple. We’ve all grown used to the graphical user interface (GUI) with its self-explanatory icons and menus. In the world of Unix that gave birth to XFS, the GUI is just the froth on the coffee, the empty calorie icing on the cake.
 Simplicity meant using the Unix command line but keeping the number of commands necessary to administer and maintain the system down to a minimum.
For those who prefer to work at the command line this option is still available. I’m just as happy using the command line as it’s what I cut my teeth on. What’s more, dropping to the command line can on occasion be quicker than using the GUI and gives deeper access to the operating system.
But for day-to-day administration, the GUI makes it simple. The FreeNAS system management graphical interface is designed to be self-explanatory. That is to say, self-explanatory once you understand the system.
For the total beginner, it’s probably only an order of magnitude or two easier to understand than the raw command line. But that’s OK—as I mentioned earlier, one of the attractions for me of FreeNAS and ZFS is the amount of help readily available out on the Web. The official iXsystems community forum is a useful starting point.
Changing the System
But administration and maintenance wasn’t what I had in mind at this point. I was about to tear down my nine-year-old stable FreeNAS system and rebuild it around a new set of drives.
Reducing the number of drives, substituting very much larger modern drives, meant I would be committed to data migration on an epic scale, as we discussed in part 2.
I spent a lot of time on this website figuring out the best price/capacity ratios. At this point, I thought I might try enticing a drive manufacturer into the adventure. In the six years that Tested Technology has been around it has developed a reputation with manufacturers for honest, arms-length reporting on their products.
A few of them regard this as a red-flag—they’re looking for “influencers”. On the list of those who appreciate objective reporting is the drive manufacturer Seagate, which has previously helped out Tested Technology reviews for a couple of Synology products.
![]() I dropped an email to Seagate. I had the temerity to invite them to donate a large number of very large drives.
I dropped an email to Seagate. I had the temerity to invite them to donate a large number of very large drives.
The response was encouraging. An interesting proposition, they said. Sending a batch of drives wasn’t regular practice—or, actually, something they ever did. However, they recognised Tested Technology as an exceptional publication and they would be happy to send them to us.
Only 14TB units were available at the moment, though.
No quid pro quo. No “of course, we’ll expect a good write-up” (believe me, this happens with some vendors). Just genuine enthusiasm for our interesting proposition.
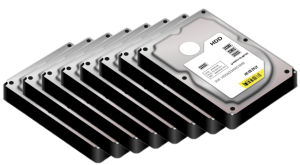
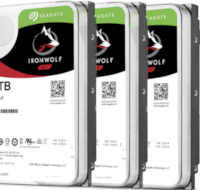
Seagate and I decided that six of these (only!) 14TB drives would work out very nicely distributed between the main NAS and its backup.
The IronWolf advantage
![]() Half a dozen large, modern drives, specially designed for the 24/7 duty cycle of a NAS is a very generous donation. Tested Technology pretty well runs on empty, budget-wise, so we’re correspondingly grateful to Seagate for helping with this project.
Half a dozen large, modern drives, specially designed for the 24/7 duty cycle of a NAS is a very generous donation. Tested Technology pretty well runs on empty, budget-wise, so we’re correspondingly grateful to Seagate for helping with this project.

Six 14TB drives, three for each server
These are IronWolf drives, devices specifically designed to cope with the vibrations, workloads and constant uptime that a mechanical disk experiences inside a NAS device. They spin fast—at 7,200rpm—which helps optimise the speed of reading and writing data. And they include a 256MB cache, a pocket (literally, in French) of fast memory to help smooth out the read/write process.
In part 2, we talked about SMART, the industry-standard Self-monitoring, Analysis and Reporting Technology incorporated into most hard drives these days. And we also mentioned shortcomings in its prognostic accuracy. A field study by Google (who, to put it mildly, use a ton of hard drives) showed that over a third fail without any warning from SMART.
Off-the-shelf NAS vendors like Synology and QNAP include GUIs in their firmware that directly report on Seagate’s IHM. Not so, FreeNAS—although there is talk in the forums of creating Unix scripts (text files that can be run as programs) to fill in the gap.
 One of the goals of reducing the number of drives was to cut down on energy consumption.
Previously, my eight 3TB drives each consumed about 7.4 watts on idle and averaged approximately 9.2 watts when rolling. These new drives idle at 5.3 watts, using around 7.3 watts while handling data.
At a rough guess, NAS drives will be working something like 85% of the time*. So the overall wattage of all those 16 old drives would be around 143 watts. The six new drives are only running at a total average of 42 watts.
Electricity here in the UK costs approximately 14p per kilowatt hour (actually, I pay slightly more). So over the course of the next year, instead of the two servers eating up a total of around £173 worth of juice, the new Seagates will merely be sipping about £52 worth.
*This may sound a lot—beginners often wonder why drives seem to chatter away even when the NAS is not being actively used. The drives are taking the opportunity of downtime to check their own data and each other’s data.
This is an important reason for equipping your NAS—whatever kind it is—with 24/7 drives designed for the purpose.
So replacing eight regular drives in each server with three enormous drives is physically efficient energy-saving. But what about the data?
One downside is that just three drives per server means saying goodbye to RAID-Z2 and its super-redundant parity, equivalent to two drives. A three-drive array, which ZFS calls RAID-Z1, only assigns space equivalent to a single drive for parity.
Should I worry? It’s something knowledgeable folk strongly advise against. And for good reason—see the box-out on RAID-Z1 at the end of this piece.
My sense is that having two NASes, one backing up the other, mitigates that risk.
Effectively mirroring the main RAID-Z1 array across to a second server should be belt and braces enough. And, thinking about future expansion, if my zpool is based on just three drives, I can increase capacity by adding only three drives more, which will be reasonably cost-effective—by the time that expansion becomes necessary I’d expect drive prices to have fallen.
Yes, distributing these six drives across two separate servers is expensive in terms of capacity: all six in a single RAID-Z2 mirrored zpool theoretically should give more usable total capacity as well as delivering better performance. So my pair of RAID-Z1 arrays isn’t what many would say accords with best practice.
However, as a compromise between the triangular dilemma of performance, redundancy and capacity, it’s one I’m prepared to live with.
Installation and connections
That’s the theory. But the first order of business was to work out how physically to install the new disks in order to get all that data across to them.
Two options were worth considering:
 Remove the drives from one of my two servers, install the three new drives in their place, pool them in a zpool then replicate the data across the network.
 - Connect the new disks to the same server create a new zpool from them and copy the data directly, zpool to zpool.
Across the network seems a logical first choice. However, with 13TB or so to copy, this would take some considerable time for each set of disks—at least a couple of days, probably more. My LAN—like most domestic LANs these days—can shift a billion bits every second (1Gb/s).
Within the computer, however, data transfer speeds are many times greater. The SATA III interface to the drives runs at 6Gb/s. Again, that’s theoretical. But it certainly suggests that direct drive to drive transfer is going to be a lot faster than using the LAN.
I concluded it would be far more efficient to connect the new disks inside the same server and avoid the data having to traverse the network at all.
But how?
The eight drive cages of each of the servers were already full. However, when you have a 3D printer to hand, you have options.
Printing in the Third Dimension (a diversion)
Commercial 3D printers are a huge game-changer, although the ones that are useful and affordable in the home are still pretty limited in their scope.
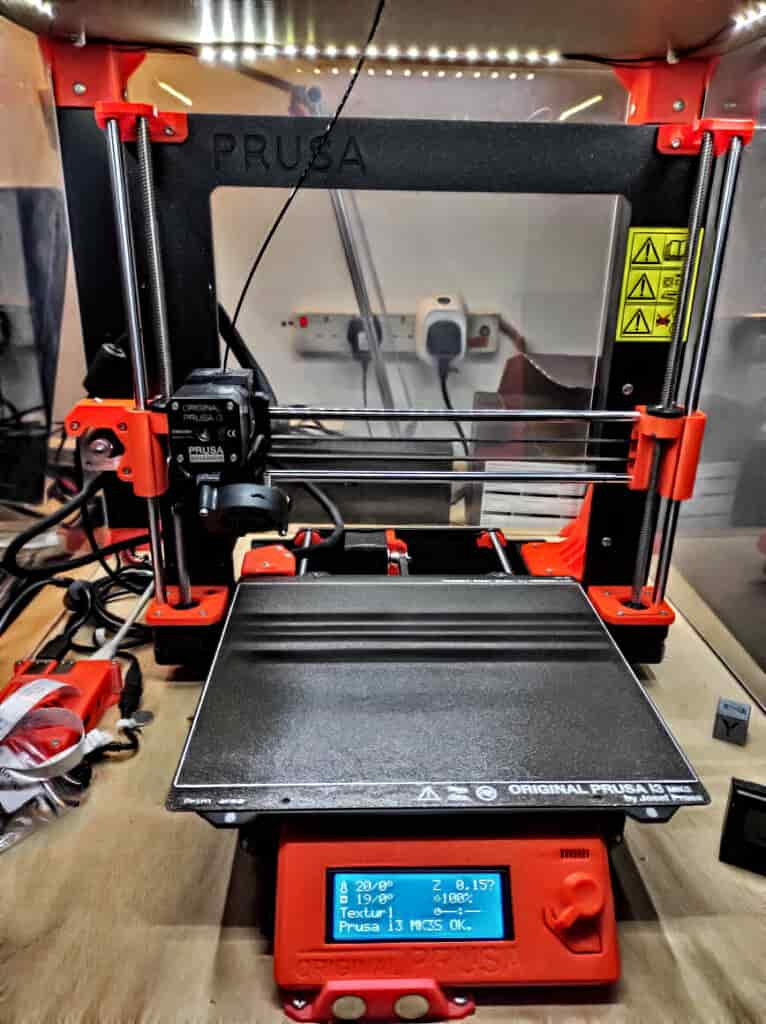
I built my Prusa I3 MK3S from kit early in 2019 at a cost of around £700. So far the genuinely useful items it’s been able to produce are a number of custom parts for the interior of my 1968 MGB, customised beehive entrances, a mount to use my phone as a satnav, custom designed curtain clips, curtain rail finials… the list goes on.
I was now about to add to that list.
A 3D print starts life as three-dimensional drawing, created in using computer aided design software (CAD). I use AutoDesk’s TinkerCAD, a free online collection of software tools.
The result is saved as an STL file (it stands for “stereolithography”) and fed into the printer, which builds up the solid artefact layer by layer.
Printing is a slow business, but with a good printer like the Prusa you can just leave it to get on with the job. The tricky part is creating the STL file in the first place.
hdd stack by dav88, licensed under CC Attribution.
Which is where the Internet comes in handy. It’s full of people cleverer than me, more skilled in the things I’d like to be able to do, and with more time to spend developing those skills.
And many of them are generous enough to share their work freely.
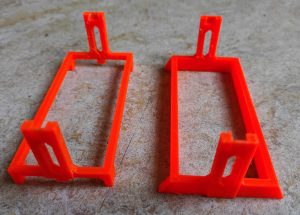
Special thanks to dav88 on the Thingiverse Website for his simple, framework-style hard drive stack. With some modest modifications to his STL file to ensure the design was robust enough to carry the weight of three IronWolfs and stop them sliding sideways, only three of these were needed. The plan was: do one server, test it, check it works, repeat with the second server.
I had a cooling fan to make sure the drives remained within their operating temperature range below 70°C during the data transfer. But this would need a bracket to hold it in place. Another 3D printing job.
This time there was nothing suitable on Thingiverse so I came up with a design of my own. The fan bracket and the adaptation of dav88’s drive stack were fairly minimal constructions. But this kept down plastic usage and for the short period they’d be in action—three days at a guess—it was fine.
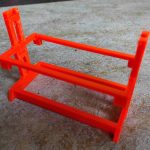
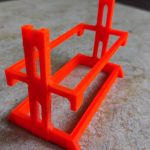
My modifications of dav66’s stacks
All set?
That’s all the physics more or less taken care of. We’re almost ready to install the drives and get the data moving. This is the point in any project like this where it might be a good idea to take a breather.
Everything set up and ready to go. You want to push on but experience tells you it might be time for—at the very least—a coffee break.
Or maybe sleep on it. Thirteen terabytes of precious data is at stake. Have you really thought of everything?
Let’s pick this up again in part 4.Manek Dubash: 11-Aug-20
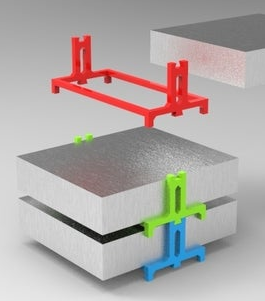
Why RAID-Z1 is a bad idea
 A RAID-Z1 array, like RAID5, devotes space equivalent to one of its disks to parity. If a disk fails, the remaining disks can use the parity information to continue serving valid data while a replacement disk is installed.
While the system is serving up this reconstructed missing data, it will also be recreating the contents of the original failed drive onto the newly installed drive. And that replacement and the subsequent array rebuild process, which we’ve been calling “resilvering” is RAID-Z1’s (and RAID 5’s) Achilles heel.
As we discussed in Part 2, today’s higher capacity drives result in long RAID rebuild times, sometimes days. During that resilvering, the drives are working as hard as they ever will, serving up data at the same time as rewriting every bit they have stored. Straining their design limits maximises the chance of a second failure. And this at a time, remember, when they have no redundancy should a second disk fail.
It doesn’t help that the RAIDed drives may all be from the same batch from the same manufacturer. A second drive from that batch might well be ready to fail in the same way.
So RAID-Z1 arrays are, the argument runs, too risky. The alternative which experts now advise is RAID-Z2 (or RAID6) which uses the space equivalent to two disks for parity.
This double redundancy reduces risk—but at the cost of one additional drive, which adds to the expense, noise and energy consumption.