
…or perhaps Linux landing on your Window machine. But it’s not yet an invasion
For several years now it’s been possible to download a “tryout” version of many Linux variants. The usual way to do this is to obtain the iso file (named after the CD format) of the operating system. Back in the day, you’d have to burn this file to a CD and boot off the CD. Today, you just install this file in a bootable form onto a USB stick and boot from there.
Typically, this will next offer you the option either to install the operating system on your machine’s hard drive or run a test of the operating system (a so-called “Live” version) that leaves your current installed operating system untouched. This Live arrangement will create a temporary file system in memory and your experiments will be written to this. Nothing on your machine’s main drive will be affected.
This is a great way to try out a new operating system on a “What happens in Vegas stays in Vegas” basis. You can get work done like this but everything the trial operating system writes into the RAM file system will be lost when you reboot. Even small details like the password to your WiFi will have to be re-entered each time you reboot on the USB drive.
Making It (USB) Stick
 But many Linux variants let you have it both ways. Run the guest operating system off a USB stick, save all the changes you make, store any new data, but still leave your main operating system intact. This feature is called “persistence”.
Persistence is a great route to take if you want to dip your toes into Linux and do some serious exploring without any risk to your existing setup.
My early ventures in this direction used a utility called Rufus. This runs in Windows and can turn downloaded iso files of many Linux versions into bootable USB sticks. Rufus also includes an option to make the USB-based operating system persistent.
Rufus is ingenious and well-thought-through. But a better approach has turned up more recently. Instead of creating, as Rufus does, a dedicated USB stick that boots a particular operating system, this newer utility, Ventoy, turns the USB stick into a device that will boot any number of different operating systems whose iso files have been copied across to it. And Ventoy provides a straightforward method of making any or all of those operating systems persistent.
The process could hardly be simpler. Download whichever version of Ventoy is right for your existing operating system and unarchive the file to create a directory of Ventoy utilities. Insert a spare USB stick into your machine and run the VentoyGUI app appropriate to your hardware (VentoyGUI.x86_64 for a regular 64-bit Intel machine.) You’ll need to make sure you’re writing Ventoy onto the correct drive as it will format that drive and delete everything on it. But assuming you’ve got that right and know how to boot your machine from a USB stick, you’ll now be able to boot straight into Ventoy.
Booting into Ventoy won’t actually get you anywhere yet because Ventoy’s talent is solely to be able to boot iso files you’ve transferred onto the USB drive. A good one to start with if you’re running a standard 64-bit x86 machine would be the newest version of Ubuntu, Jammy Jellyfish, which you can download from here.
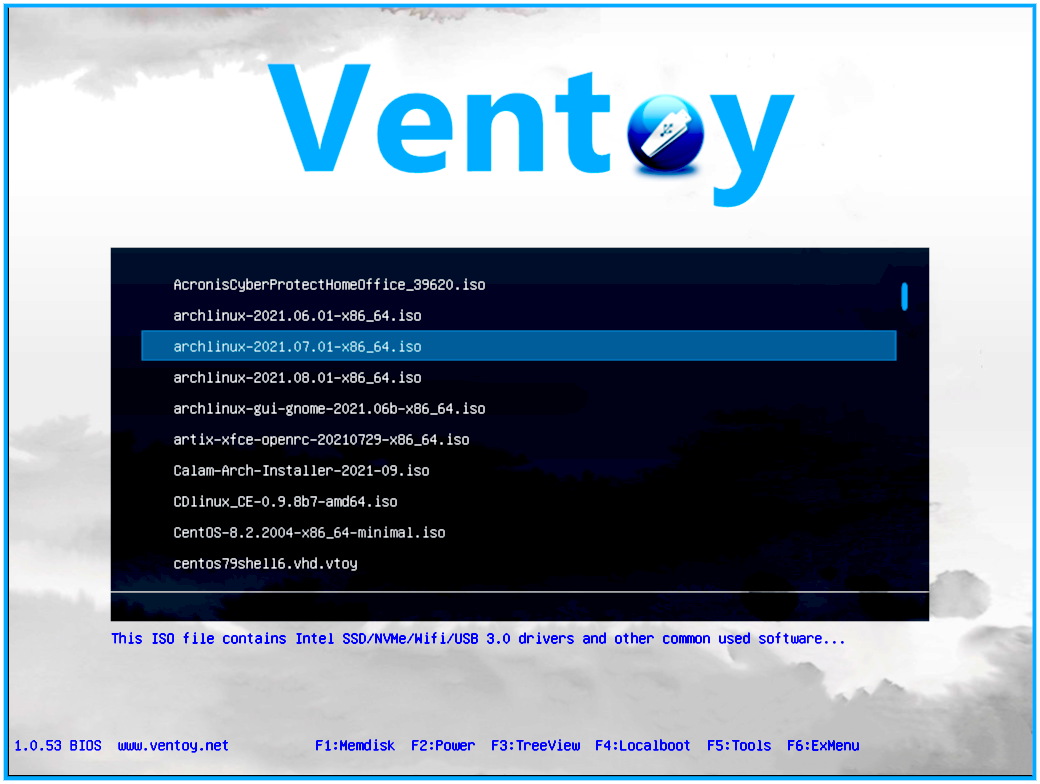
The default Ventoy menu, here showing a collection of multiple isos.
With Rufus you’d have to set aside a USB stick for this one version of Linux and go through the process of turning the iso into a bootable format. But once you’ve prepared your USB stick with Ventoy, all you have to do is copy the iso file across to it. Reboot your machine on the USB stick and Ventoy will present you with a simple menu.
Just hitting carriage return here will boot you into Ubuntu. The illustration shows a number of different isos. I’d recommend that Linux beginners start with just the Jammy Jellyfish iso I mention above. Get the hang of that and then you can add as many other isos as will fit on your USB stick (there’s plenty of choice).
Booting into Linux like this is, as we’ve said, a purely transitory business. But with Ventoy, unlike Rufus, you can add persistence retrospectively. Once you’re happy with the operating system you can seal the knot by creating an extra file on the USB stick and adding some simple code to tell Ventoy what to do with it. If you’re not happy with the operating system and want to explore alternatives, just add extra iso files corresponding to the operating systems you want to explore. Not every iso will work with Ventoy but the Ventoy site has a huge list of those that will.
Ventoy Persistence
 To sum up: Rufus requires you to decide at the time of creating the bootable drive whether you want persistence. Ventoy lets you throw a bunch of random isos onto the USB stick (see picture above), take each of them for a (non-persistent) test drive and then add persistence to those you want to explore in more depth.
Better still, you can quickly add just a small volume of persistence (one GB, say) for further test purposes, then when you’ve settled on the operating system(s) you want to stick with, expand the persistence up to the maximum available on the USB stick.
Ventoy persistence has two elements. The iso file is supplemented with a data storage file (which will define the size of the persistence) and, separately, a couple of lines of coded information to tell Ventoy which iso the data storage file is to be linked to. The data file will be in the root directory of the USB stick and the information file is stored in a subdirectory called “ventoy”.
One complication is that different operating systems that support persistence use different file formats to do this. There are only four of these formats and the Ventoy site lists them with their associated iso here, along with the rules for creating the linkage information. You’ll need to be clear about this when creating the appropriate data format for the iso you’re going to boot.
As all the files are almost entirely full of zeroes, the zipped download file is only a few hundred Kb in size. Pick the persistent files you want to unzip—but be aware the output files are going to be gigabytes in size.
CreatePersistentImg.
You add the linkage information in a format called JSON (JavaScript Object Notation). It’s an open standard data interchange format and like most programming languages it needs to be letter- and punctuation-perfect to do its job. If you’re new to programming this could be a show-stopper for you. But Ventoy can help you with this, if you’re up to a little command line work.
Among the Ventoy utilities you downloaded originally is one called Ventoy Plugson. Run this in a terminal with a parameter that tells the script the location of your Ventoy USB stick. This will open a local Web server on your machine that you can access using your browser. Among the many utilities Ventoy Plugson offers here you’ll find Persistence. Up in the right hand corner of that Web page is a link to details of how get this utility to write the JSON file for you.
Of course, you can also write your own JSON file. You’ll need to make sure you’ve got the names of the iso and dat files exactly right and that the JSON syntax is correct. I generally copy and paste file names directly from the files themselves (in most operating systems the way to do this is to put the file into rename mode (without actually renaming it).
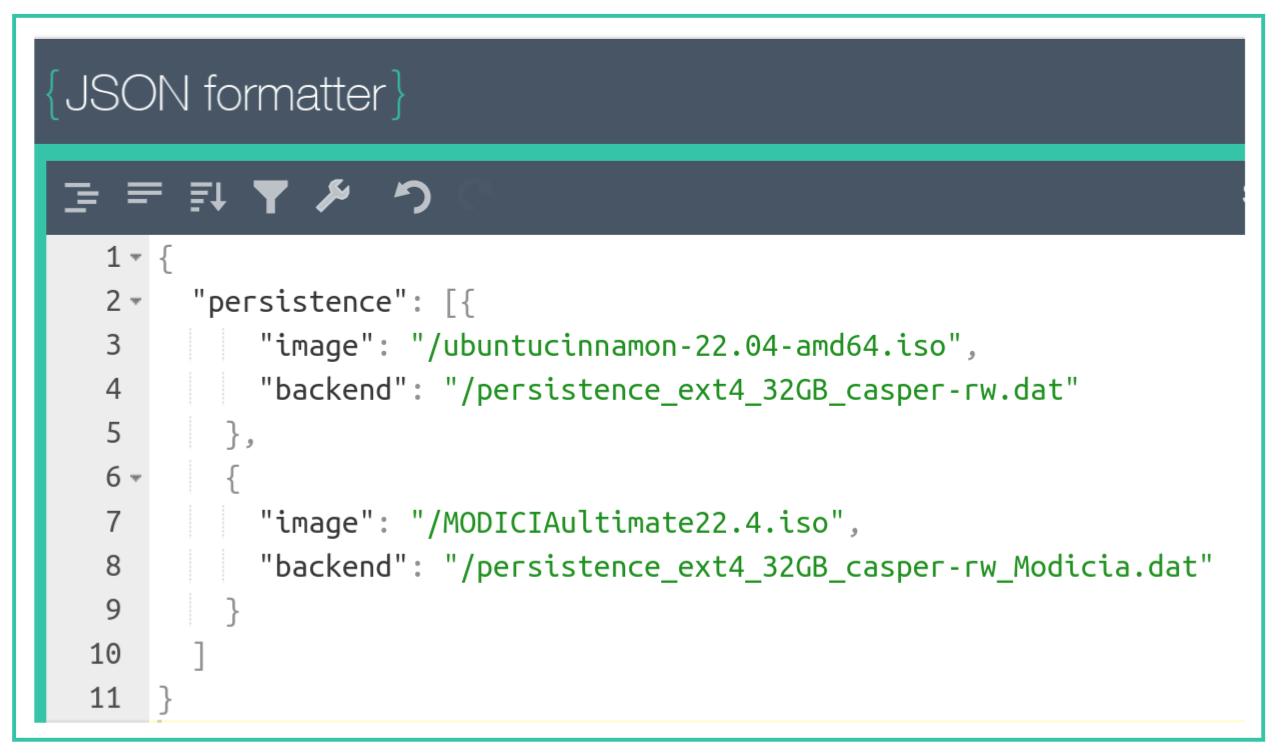
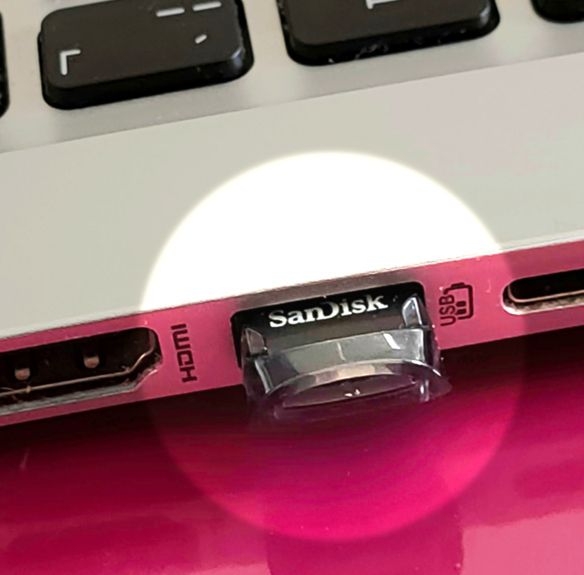
Checking in at JSONformatter to validate a script for a pair of Ubuntu variants I’ve been exploring on a 32GB SanDisk Ultra Fit USB stick. I’m currently running standard Ubuntu 22.04 on my main drive.
JSON files like the one illustrated here have fancy formatting with indents that align the curly brackets. This isn’t part of the syntax, just a visual aid to make the code more readable and ensure open and close brackets match (a process known as “beautification”). If you google “json linter” you’ll find a number of Websites (in addition to the one I used in the picture, here’s another) that let you drop in your JSON code to check the syntax and beautify it.
Etcher doesn’t give you persistence or multi-operating system booting. But for a simple Linux install or try-out it gets the job done. You can read about the MacOS command line approach and Etcher here.
The Three-Prong Strategy Revisited
Perhaps I should have called this a three-and-a-half-pronged strategy, because there’s one more element to consider. When I say that Tested Technology is now all-Linux, I’m allowing myself to include Web apps because much of the Web really does run on Linux. By the same token, my Android phone is also based on Linux. The Android phone plays a significant part in the production of this Web publication.
Phone-Notebook transparency.
For example, there’s nothing in Gimp—not even among the wealth of G’MIC-Qt filters it includes—that quite matches some of the functions in Google’s Snapseed Android app. And in any case, most of the photos we use in Tested Technology will be taken on the phone anyway. So the workflow is: Snap the photo, edit it in Snapseed (and perhaps another app like PicSay to add annotations) and then wing it across to whatever machine is running WordPress on Linux.
Did you pause for thought on that phrase “wing it across”? The workflow heavily depends on more-or-less completely transparent transfer of data between the phone and the Linux computer. A year ago I was using Qsync, a utility supplied by QNAP with their NAS operating system. This sets up an automatic sync between selected directories on the NAS and corresponding directories on the various desktop machines on the LAN. A QNAP Android app ties the phone into the same arrangement.
The Qsync setup required me to copy the phone photo over the LAN to a particular NAS directory, which would then make it appear almost simultaneously on whatever Linux machine I was using (Qsync being a proprietary application that’s available for all three major operating systems). Workable, but not exactly completely transparent.
 For the past several months I’ve been short-circuiting
 Qsync using an easily added extension to Ubuntu called GSConnect. A corresponding app on the Android phone called KDE Connect creates a virtual worm-hole to the phone on the Ubuntu machine. Using an Andoid feature borrowed from the original concept in Unix called “piping”, I simply Share the photo to KDE Connect and it appears instantly in Ubuntu’s Download directory (or whichever directory I’ve chosen as the target).
The worm-hole works in both directions, so the phone and the Ubuntu device almost meld into a single work machine.
Coming Next
 I realise that a lot of what we’ve discussed here may be new territory for Windows and Mac users who just run the apps without much thought about how it all works. But in the same way that Covid has tended to make us more health conscious, maybe we should all be getting a bit more conscious about what’s going on inside our operating systems. If Linux is going to be your operating system (rather than theirs), spending a little time learning to peddle the treadle is perhaps no bad thing.
If you don’t agree, that’s OK too. We’ll be discussing later how to do a simple complete installation that will bring a neglected old laptop back to life and we’ll also be talking about the growing list of hardware manufacturers who can sell you a complete, ready-to-go Linux computer. (With a special mention for Framework, whose hardware is not only Linux-friendly, but also very Right-To-Repair aware.)
Meanwhile, in part 4 we’ll start getting serious, moving from “Live” testing and persistent “Linux-on-a-stick” to installing Linux as your main operating system.
Chris Bidmead 05-Jun-22