
The aim as set out in the prelude to this story is to emulate the excellent FreeNAS saga told by Manek Dubash—implementing a network-attached storage server on an old PC machine. But now using very different software from the super-resilient operating system and filesystem that was his central theme.
This time, we’re looking for a trade-off that possibly loses some of the technohypercondria inherent in the ZFS-based approach Manek uses but gives us much greater flexibility and economy.
These are key goals. We will not be writing off huge amounts of valuable disk space in the service of redundancy. And we won’t be insisting that every time we write to a drive or read from a drive that all the drives in the array must be spinning. Or that even when transactions aren’t taking place between the device and the network, its drives keep themselves busy around 80 percent of the time checking on themselves and each other.
And instead of depending on the ordered symmetry of an array that requires identically sized drives, we will end up with a system that allows us to bung in any old disks that happen to be lying around (very roughly speaking).
That was the original plan. It’s changed since its first conception in a couple of ways, not least thanks to the very welcome donation from drive manufacturer Seagate.
And one other less welcome discovery…
 I should emphasise that the aspirations set out above and in our prelude are far from being Tested Technology’s conclusions about UnRAID. They’re a description of the capabilities of a commercial product based on the promises of the manufacturer, Lime Technology, and reports from existing users. We’ll see how far this will take us.
Now for some bad news. Our plan to follow Manek by repurposing an old but good piece of ancient hardware has hit a brick wall.
The mighty Cosmos tower machine mentioned in the prelude has been sitting unused in the Tested Technology office for several years since we decommissioned it as a Hackintosh. With its Coolermaster Cosmos case with twelve spare drive bays and solid Gigabyte GA-EP45-DS3R motherboard and Q9450 Intel processor decked out with 8GB of Crucial DRAM, it seemed ideal as an UnRAID server.
These valuable items, case, motherboard, processor and memory, were all donations from their respective manufacturers and we were looking forward to renewing our thanks to them in the context of this resurrection. To this end, we worked for well over a week to get UnRAID going on the rig. And failed. And failed again. And again.
The crazy thing is that the machine is fine. Using the CD drive (those were the days) we can boot into any operating system of our choice. UnRAID, though, doesn’t boot from a CD. It requires a USB stick. The Cosmos machine should be able to do that too because this was the sole method of booting Hackintosh MacOS back in the day. We did get one or two operating systems to boot from USB. But not UnRAID. After giving it our best shot multiple times we ran out of ammo and bailed.
At least for now. It’s something I’m hoping we can loop back to. But the important thing is to get on with the story for Tested Technology. As an alternative plan, I contemplated a complete rebuild with a modern motherboard (which may still be necessary) but that would hold things up even longer.
The eBay vendor had successfully been running UnRAID on this.
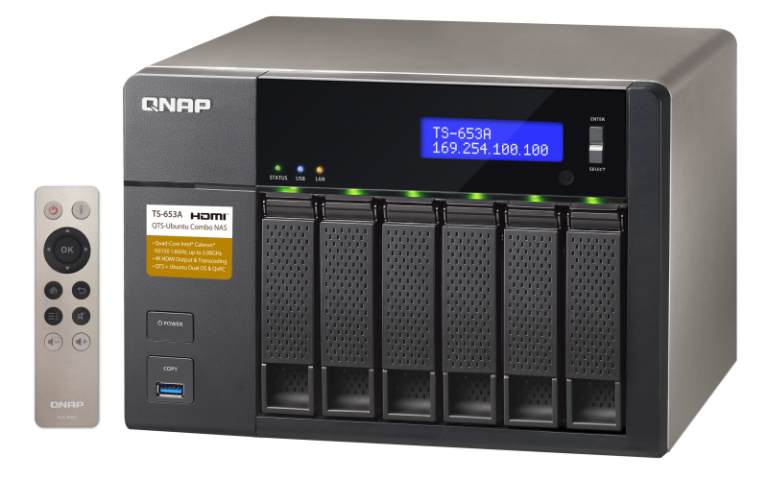
Plan B included checking out eBay for some less ancient PC kit that might fall within Tested Technology’s tiny budget. It was here that I stumbled on a vendor with a 6-bay NAS enclosure for sale. This pre-loved item was on offer at a very decent price but well outside our budget. But two words in the description struck me: QNAP and UnRAID.
For the purposes of the sale, the seller had reinstated QNAP’s QTS operating system. But for much of its life, this machine had been running UnRAID. This would have been the ideal machine for our project.
I used eBay’s messaging system to find out more, making it clear that I wasn’t likely to be a customer. There are some good people on eBay, and this particular vendor, Prasanna, turned out to be one of them. He very generously shared his experience of doing an operating system conversion that turned out to be rather simple.
And one—thank you, Prasanna—that I could apply to Tested Technology’s six-year old QNAP TS-451.
Dealing with the DOM
Prasanna warned I should physically remove the TS-451’s DOM before proceeding with UnRAID. DOM stands for “disk on module”, a small daughterboard housing flash memory that presents to the rest of the system as an internal read-write USB device. Like many NASes, the TS-451 uses this as a place to store the updatable operating system, generally referred to as “the firmware”.
This daughterboard plugs into the motherboard through a standard 8+1 motherboard USB connector. Why remove it? QNAP’s DOM wouldn’t only be redundant when booting from UnRAID’s USB, it would be dangerously present. We intend to restore this machine to QNAP goodness once it has finished helping us with this adventure and we’ve moved UnRAID to whatever Plan C machine presents itself. Leaving the DOM vulnerable to being overwritten by UnRAID would be a serious risk.
 UnRAID detects the DOM as a flash drive and would be happy to add it to its drive array as a candidate for data storage. It won’t do this without your consent. But if you take this bait, of course, once new data is written on it the device will no longer boot as a QNAP NAS. At the very least, you’ll give yourself an amusing sub-adventure trying to get the original firmware back on.
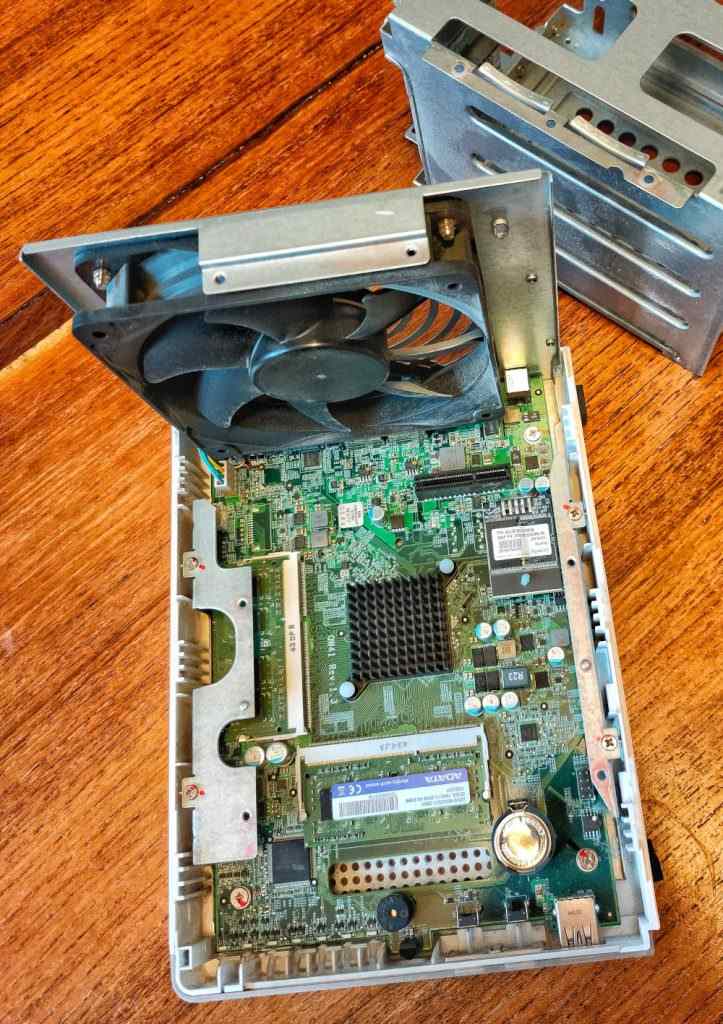
Physically accessing the DOM requires the removal of the TS-451’s outer casing—four small screws—and then six more screws to open up the drive cage. All these screws are somewhat on the soft side and very tightly locked into position. Initially, this appeared to be another showstopper, my small screwdriver struggling to achieve traction and beginning to gouge out the screw heads.
Ironically, I’d just written a short Tested Technology piece investigating a Zen approach to exactly this kind of problem. In this present case, Zen contemplation of the screws’ interesting individuality soon led me to the solution—a solution of WD-40, left to soak through the screws overnight.
Disappointingly this two-day journey (one overnight soak for the case screws and another for the drive cage screws) revealed a DOM that QNAP clearly wanted to be left in place. The clue: it was secured onto the USB connector with a huge blob of glue-gun glue.
Prasanna told me later that he’d encountered a similar blob but had managed to chip it away fairly easily. By then, though I’d put the machine back together again.
The teardown did teach me something useful, though. The TS-451 currently has a modest 4GB of DRAM, in two RAM slots. It’s easily upgraded, officially to 8GB and unofficially to 16GB. Useful to know, whether it’s running UnRAID or QTS.
I decided to push on with the DOM in situ. There surely must be some software way of locking out the DOM from UnRAID’s clutches?
The UnQNAP is Born
UnRAID starts out as a download of an app that checks the suitability of the USB stick you intend to house the installation on* and then follows through by creating a bootable version of the operating system. Versions of the UnRAID USB Creator are available for Windows or the Mac. There’s no special version for Linux but Linux users can download the full folder of required files, which can then be copied onto a FAT32 formatted USB stick manually. Running a script contained in the bundle will then make the USB bootable.
By default, the USB stick you build like this will name the device it boots into as “Tower”. You have the option to change this prior to creating the USB stick (or later, through the UnRAID WebUI). I thought UnQNAP might be an appropriate name in the circumstances.
That USB “suitability” is a speciality of UnRAID. It’s picky about the USB stick you use. In part because reliability is going to be rather important—if the USB stick fails you have no UnRAID machine. UnRAID also needs to collect the “fingerprint” of the stick so that it can validate the licence against it.
What I’m calling a fingerprint doesn’t actually exist on the USB flash drive. Reliable flash drives have serial numbers and the Linux kernel at the heart of UnRAID uses this number, in conjunction with the manufacturer and product ID to create a UUID (universally unique identifier) that defines that single stick. The licence you buy from Lime Technologies will be tied to this UUID.
I dug up a couple of very neat, low profile 2GB USBs that looked as if they would do the job nicely. UnRAID only needs 128MB to get started, but this gets larger when you start adding your choice of the very many UnRAID plug-ins. So 2GB looked comfortable.
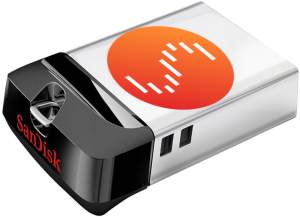
Sadly, the UnRAID USB Creator didn’t like these USB sticks at all and pronounced them “blacklisted”. I ended up using a 16GB SanDisk UltraFit, which is probably more than UnRAID will ever need, even with a mass of plug-ins. But the extra cost may not be wasted as Lime Technology says there’s evidence to suggest that larger flash devices subject to frequent writes last longer, the flash disk controller having more scope to manage wear balancing.
Not that the “frequent writes” issue arises with the UnRAID boot drive. At boot, the operating system is copied into a RAM drive and run from there (see side note above). Writes to the USB boot drive only happen when you add a new plugin and not even always then.
(If the boot USB stick should fail for whatever reason, Lime Technology offers an automated way of replacing it, preserving the licencing.)
Bypassing the DOM
Two very important factors make the QNAP TS-451 suitable for UnRAID that are not shared with the Synology, Buffalo or WD NAS devices Tested Technology has gratefully gathered from donors over the years. Very importantly, the QNAP uses an Intel processor, a Celeron J1800, running at 2.41 GHz. The other NASes are ARM-based. UnRAID will only work with Intel processors.
The second non-trivial factor is that the QNAP has HDMI output for a monitor.
A small NAS doesn’t need—and typically won’t have—any kind of video output. Once booted, its internal Web server kicks in and you manage it over the LAN through a Web browser. But the TS-451, like several other QNAP servers (including the one Prasanna is selling), is part-server and part-PC, intended for optional use as something like a multimedia centre for the living room. QNAP’s QTS operating system makes special provision for this.
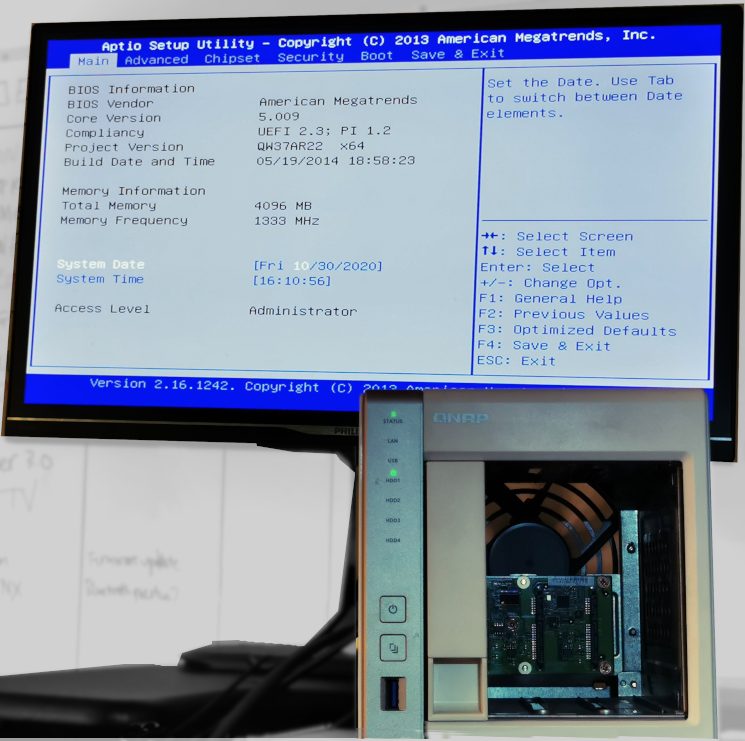 You have probably guessed already why this is important. I won’t need the HDMI monitor once UnRAID is up and running. But booting into an attached USB stick instead of QNAP’s internal DOM requires changing the boot drive order. That can only be done in the BIOS—and the inner workings of the BIOS are something you’ll never see over the LAN.
With the monitor plugged in, it was a simple matter to persuade the American Megatrends BIOS (dated 2014—hardly fresh, but at least 15 years younger than the Gigabyte BIOS we’d been wrestling with) to attempt to boot first into the attached USB stick.
At this point, I realised that leaving the DOM in place had a distinct upside. By setting the BIOS so that the DOM was the second boot choice I would now be able to switch back and forth between UnRAID and QNAP with no need for a monitor, depending on whether the external USB stick was inserted or absent. (Obviously, this would also entail making sure the drives were appropriately swapped over.)
I removed all four drives from the QNAP and stacked three of them safely away in their caddies. I needed one of the caddies for the new Seagate IronWolf Pro I was about to install as the initial single drive. The QNAP caddies are attached to the drive with four small screws. But the drives are a neat fit into the caddies and two screws per caddy is probably as much as you really need.

QNAP’s animated Qboost icon
Having safely cocooned the four original QNAP 6TB WD Reds, I loaded the new 18TB Seagate drive into the caddy and snapped it into the TS-451. With three of the caddies missing, the front of the machine reminds me rather of a recession-hit High Street. Leaving three slots open like this isn’t great for the airflow. But one of the first things I discovered on powering up into UnRAID is that I’ve lost fan control—the big fan at the rear of the TS-451 is going full blast all the time. I’m hoping there will be an UnRAID plugin to cope with this.
In any case, if everything goes to plan we should have all the drive slots populated before the end of this series.
When creating the USB boot disk you have the option to choose whether the server will have a static or a DHCP-allocated IP address. Initially, I chose DHCP but for some reason I’m still investigating, I couldn’t get this to work. You know when DHCP has failed because the system allocates itself a fictional IP address that doesn’t relate to the rest of your LAN. Using the static address option was a simple workaround.
The UnRAID icon
With the UnQNAP booted and the IP address allocated I could now find it on the LAN using a browser. Unlike QNAP’s decorative QTS interface, the WebUI UnRAID offers is plain and simple. Only one fancy animated icon (the UnRAID icon, which appears while the WebUI waits to collect data) and no slide-out panels. Just the facts, ma’am.
Up and Running
There’s so much that can be done with UnRAID, even this current one-drive version, that it’s hard to know where to begin. But as a key part of this project has been the generous donation of drives from Seagate, one now installed, a second awaiting installation and a third, rather different 18TB drive due to be delivered soon, a sensible starting-point seemed to be running a drive speed test.
An UnRAID system isn’t by nature speedy. There are workarounds for this that we’ll come to. But its core design involves security mechanisms that inevitably slow down the writes. Any write speed test we do at this very simple one-drive stage in the installation isn’t going to be meaningful once those mechanisms are implemented. So for now I’ll just stick to testing read speeds.
Drive speed in a device like this TS-451 has a theoretical limit of 6Gb/s imposed by the SATA III interface to the processor. In practical terms this should work out at between 500-550MB/s. That’s not going to be a bottleneck for mechanical drives, even a fast drive like the IronWolf Pro, which has a spindle speed of 7200 rpm. These Seagate drives have a maximum sustained throughput of 260MB/s. I’d expect the speed in a real-world device like this QNAP hardware to be a little less than that.
There are a couple of ways of testing drive speed using UnRAID. The hparm Linux command line utility is a useful tool but there’s also an UnRAID plugin that can fill out the picture with graphics. This plugin is a Docker container. Dockers are a crucial enhancement to UnRAID; for now, it’s enough to say that a docker is a kind of sandboxed application running on the NAS but separately from other applications on the system.
For our single current 18TB drive, hdparm, running in the UnRAID terminal, looks like this:

I understand that the error message in the first line can safely be ignored. It may be because UnRAID is using a rather old version of hdparm.
That’s the average drive speed, a little short of Seagate’s own specs but still very respectable. However, we can learn more from an assessment of the drive as delivered by John Bartlett’s excellent DiskSpeed plugin :

The graph raises the spectre of my old chemistry teacher, Mr Creighton, who would with uncanny precision hurl chalk at any pupil who omitted or otherwise munged units in an answer. I confronted the relevant UnRAID forum topic with the problem arising from the use of “G” and “T” as units on the axes here. The presumption there seemed to be that the abbreviations are fine because “everyone knows what they mean.”
Actually, I didn’t. And you may not either. On the Y-axis, M is evidently a unit of Speed and it’s probably fair to presume that anyone capable of interpreting the chart at all will know that M here evidently stands for megabytes per second (although not to the satisfaction of Mr Creighton).
The X-axis is rather more difficult to deal with. The axis is labelled Size, so we seem to be talking about data volume. Again, it’s a reasonable guess that “everyone knows” that data volume is traditionally measured in bytes, the T here standing for terabytes. And, in any case, if you hover over any point on the curve, a pop-up definitively resolves this (see below*)
The problem is that it’s not actually clear from the chart what “Size” means. You might think we’re reading ever larger chunks of data from the drive as we move along the X-axis? But wait… this is a very large Seagate IronWolf drive (John Bartlett’s app is useful for all makes and sizes of drives). If we’re reading all 18TB of the drive for that last measurement on the far right, that part of the test alone, even at the maximum theoretical speed of the SATA III interface, would take (I’m cribbing from WolframAlpha here) 8 hours and 20 minutes.
That’s not what the test is doing. It’s reading a fixed number of identically sized blocks from different parts of this disk. So why is the speed different from one end of the graph to the other?
As the disk is spinning with constant angular velocity, the blocks at the perimeter of the disk are travelling very much faster than the blocks close to the centre. Because of this, the data transfer rate from the perimeter is much greater than data transfer from the more central blocks. The test begins to read the drive from the perimeter, moving closer to the centre with each read. The falling curve represents the declining data transfer rate as this proceeds.
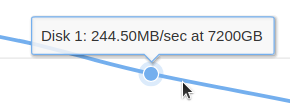 For a general assessment of the disk’s transfer speed, it makes sense to choose a spot somewhere near the middle of the curve. The graph that DiskSpeed produces is dynamic—when you’re looking at it from the browser, the cursor positioned on the curve will produce a bubble pop-up with the values at that point. At this point the Y-axis units become clearer—they’re MB/sec.
The X-axis values still show up, slightly misleadingly, as xGB. The best way to read this is not as a Size but as a Location. It’s the position on the disk that would have been the endpoint of any notional xGB file written sequentially from the perimeter towards the centre.
DiskSpeed allows you to archive these graphs. John Bartlett suggests that comparison between graphs as the drive ages might be a useful addition to SMART health diagnosis. Oh, and I also gather that the Creighton problem is out of his hands. His app collects the data; how it’s displayed is an external function beyond his control.
Can You Trust a One Drive NAS?
The first thing that strikes me is that this single drive NAS has nearly two-thirds more capacity than when the QNAP was running four 6TB drives in RAID 10. True, now no space is being used up for redundancy or error checking and Manek would probably be fretting about this. You can pick up 6TB drives of the kind we’ve been using in the QNAP for around £180 each. But to match the Pro class of the Seagate drives you’d be paying around £200 each. So the total cost of four 6TB WD Red Pros (for instance—this isn’t a Seagate versus Western Digital price challenge) is £800.
RAID is costing you, say, £800 and giving you 11TB. Amazon is asking £600 for a single 18TB Iron Wolf Pro.
RAID is pretty expensive.
There are some other factors to think about. Pro class drives like these IronWolf Pros and the WD Red Pros tend to come with a 5-year warranty, covering what’s generally regarded as the useful trusted life of any drive. This is one reason for them costing more than the three-year warranty regular consumer drives. Pro drives that fail within this period can be swapped carriage-free.
But your data? Professional data recovery from a dead drive is a very costly business. However, if you lose that IronWolf Pro during the first three years of the warranty, Seagate throws in data recovery for no additional charge. From this it’s a reasonable conjecture that, over those the first three years at least, an IronWolf Pro drive can be regarded as at least as reliable as a conventional 4-drive RAID 10 array.
So, at least for consumer and small and medium business use, a single drive NAS based on a Seagate IronWolf Pro, with two-thirds more capacity than the equivalently priced RAID array, starts to look like a bargain.
Onward and Outward
Of course, for a single drive NAS you wouldn’t need UnRAID. But data eat up drives and before you know it you’re going to want to expand. And when that data recovery warranty runs out you might want to look for extra protection for the contents of your drive. With UnRAID you’ll be ready for expanding capacity and enhancing data protection.
In the next chapter, we’ll be adding that parity drive, which will give us no extra capacity but should bring the protection at least up to par with our RAID 10 QNAP. No great excitement there, although it will be interesting to see how long it takes to build the parity drive.
Chris Bidmead: 11-Oct-20