
Last time I talked about QNAP updates and promised to say more about the 6 GB Red drives that Western Digital has supplied to help me through this NAS Server review. The NAS updates have galloped forwards since then, and we’re now on a major update version of the QTS operating system, version 4.2. A lot has changed, including the look and feel, so some of the earlier screenshots I’ve included here are out of date.
Luckily, the previous parts have mostly been about the fundamentals, so we can press on regardless. The problem I face is that this latest update has brought a bunch of new functionalities, and if QNAP keeps doing this my review’s going be like painting the Forth Bridge (a not insoluble problem, it turns out).
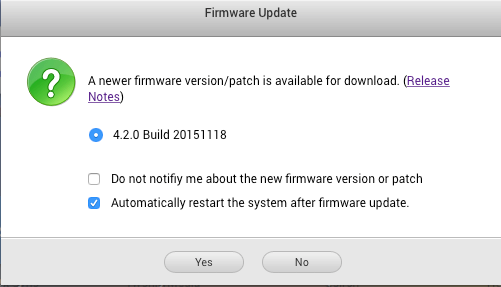 NO SOONER HAD I WRITTEN the above intro than the TS-451 announced yet another system update—happily a minor one this time. I hope I don’t sound as if I’m complaining about this: it’s all good stuff and the sense that a gang of developers are working night and day on software improvements lightens my heart.
System updates are a lengthy process, involving a double reboot, as QNAP recommends restarting the server before applying the new version to ensure the various daemons we talked about earlier all close down properly. Once the new firmware is downloaded and installed you need to reboot the system again. It turns out that this particular update comprises bug fixes, many of which don’t affect this version of the hardware, so I could have skipped it if I was too busy with the server to afford the downtime—in total the update and reboots take about ten minutes to a quarter of an hour.
Drives
The 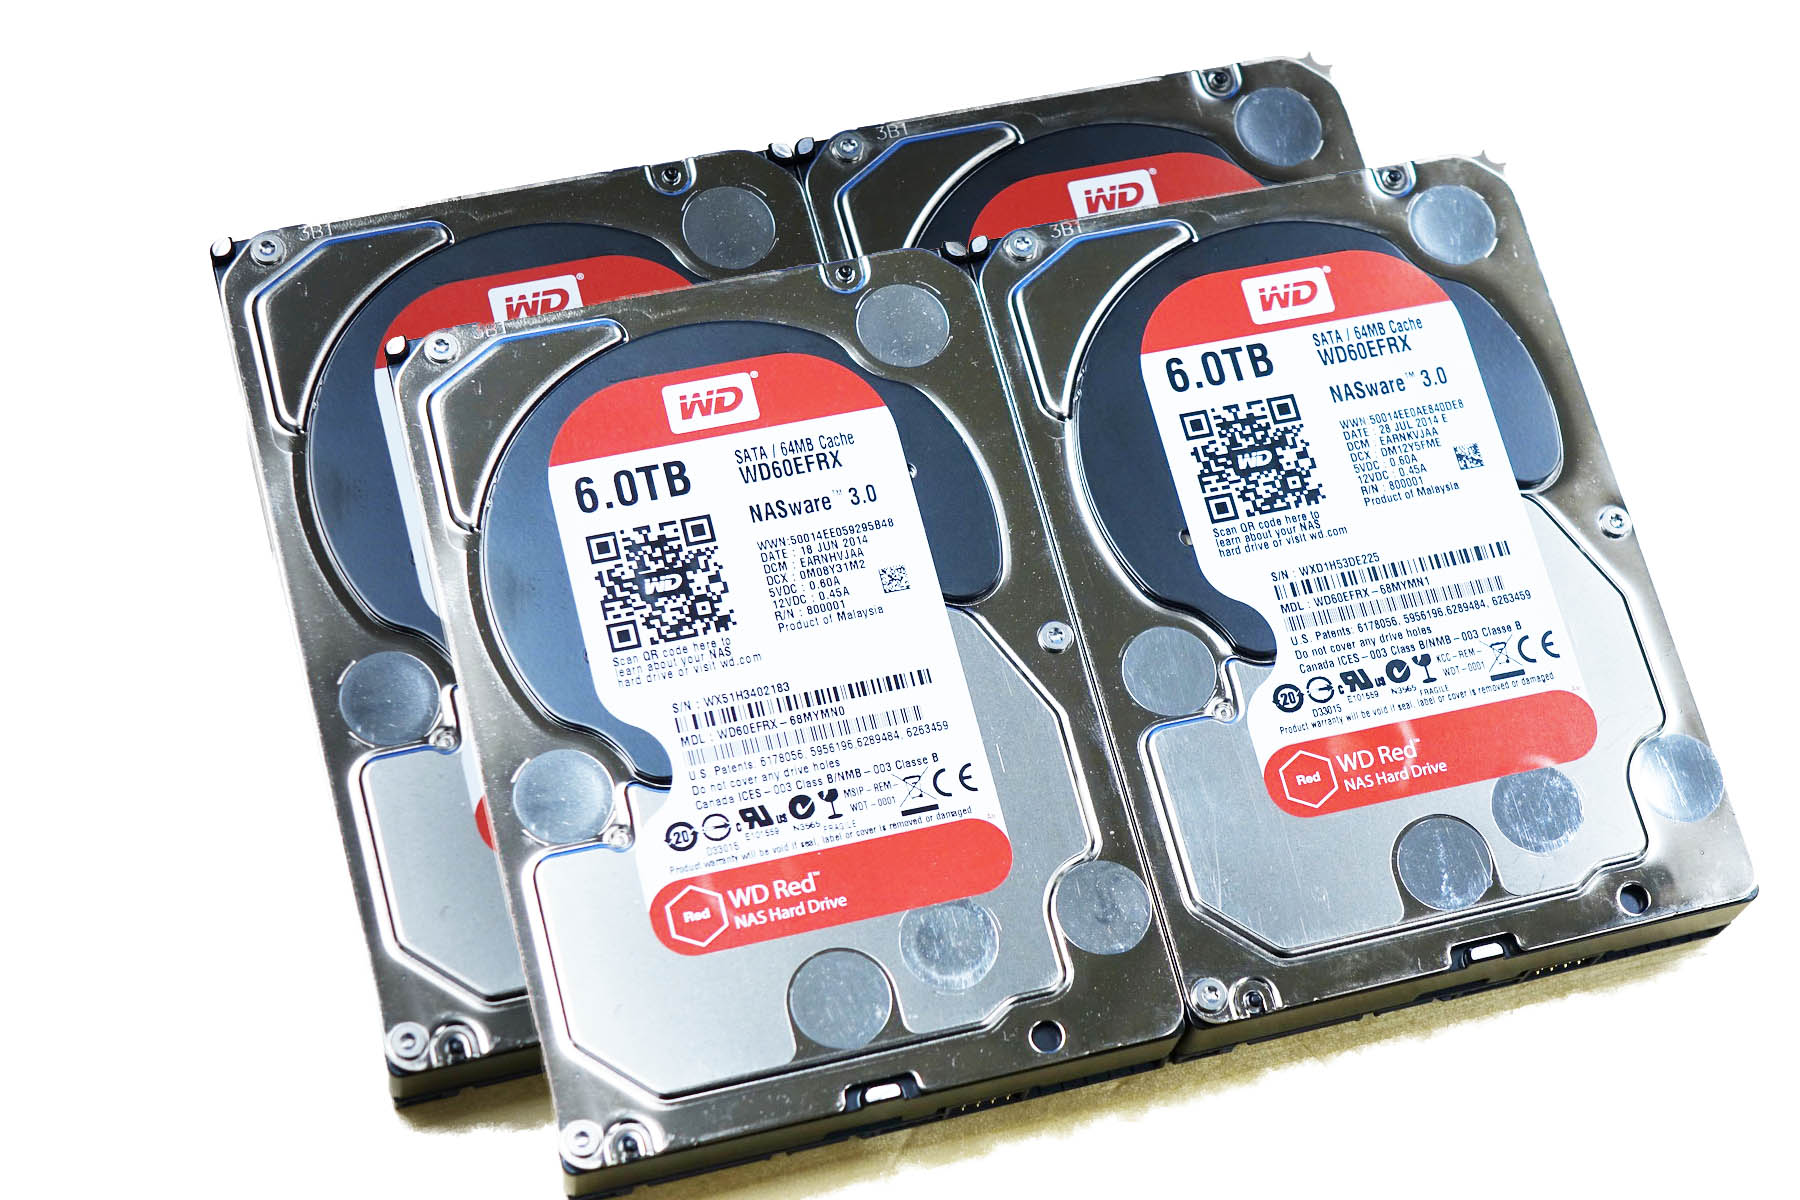 windfall from WD I mentioned in part 2 presented me with four 6TB drives, a total of 24TB. My sceptical friend Barry asked me what on Earth was I going to do with all that storage. I said I’d start by backing up the Internet. I was joking, of course. The Internet is estimated as being in excess of 1YB and growing exponentially.
Even without the cat videos and the porn, that’s still going to be a lot of terabytes. And in any case I knew that any sensible multidrive NAS would be using RAID, a technique that trades off drive capacity for improved reliability, data security and (sometimes) speed. More of this in a moment.
My intention was more modes—to consolidate the various multimedia files scattered across my LAN and then begin adding rips of all my music still on CDs. However, pressure on Parliament from the Musicians Union meant that ripping one’s own CDs became illegal again this summer here in the UK. So I’ve obviously had to change that part of the plan (yeah, right).
As I mentioned in part 2 I began by installing a single drive, with the intention of expanding as necessary. Or not necessarily expansion. When I came to install a second drive, rather than make the drive capacity larger I was planning to increase the data security by using the second drive to do real-time backups of the data on the first drive, a process known as “mirroring”. Actual expansion would happen with the sequential addition of drives 3 and 4.
My hope was that on installing the second drive the original data would just be automatically copied across to it. But (as far as I’ve been able to discover from subsequent enquiries) no NAS using standard RAID actually works like this. To be prepared for mirroring a drive needs a special “I’m going to be mirrored” format, which is not the same as the “I’m just a single drive” format. Switching from one format to the other would require all the data to be backed up first.
It became clear that expanding the NAS to match on-going required capacity was going to be a lousy idea. With the addition of each drive it seemed I would have to do a full backup, reformat, and restore. Having got through my early proof of concept tests with a single drive the sensible thing seemed to be to install all the drives at once. Which is what I did.
RAID
The acronym stands for “Redundant Array of Independent Drives”. At least, that’s what today’s manufacturers will tell you. Actually, they’re fibbing. RAID was an innovative disc storage idea that came out of the University of California at Berkeley in the late 1980s. The acronym originally stood for “Redundant Array of Inexpensive Discs”, and it hinged on the discovery that the relatively cheap hard drives being sold for personal computer use, although not necessarily as individually fast and reliable as the much more costly devices used in the mainframe and microcomputer industry, could be employed in groups in ways that could greatly improve their speed and/or reliability.
Key to the RAID idea is that when a drive fails it can be replaced, and any missing data can be restored from redundancy in the remaining good drives. But this restoration takes time and works the drives continuously and hard. Any second drive failure at this point will jeopardise the restoration process, and—with the exception of the more sophisticated RAID configurations—will most likely result in complete data loss.
Late ’80s drives were slower than drives today, but because they were very much smaller the restoration process was relatively quick. Restoring data in a 4 drive RAID array when each drive is 6TB in capacity might take a whole day. That’s a whole day of maximum drive thrashing, and if a second drive is nearing its point of failure this is precisely when it’s going to go. Along with all your data.
RAID arrays can be arranged in different ways, depending on the number of drives available and how you prioritise speed and data security. The first two array patterns, known as RAID 0 and RAID 1, weren’t a new idea, and don’t really qualify as RAID, but are a useful introduction to the principle.
RAID 0 improves the read speed of a pair of cheap drives by writing each file across both drives: a chunk of data onto drive 1 and the next chunk onto drive 2, rinse and repeat. This is called “striping”.
RAID 0 can be extended across multiple drives, the speed of reads and writes being approximately multiplied by the number of drives in play. Speed is RAID 0’s sole advantage. There’s no data redundancy, and if one of the drives should fail—tough, the chances are you’ve lost everything.
RAID 1 takes the opposite approach. Every scrap of data written to drive 1 is also duplicated on drive 2, a process I’ve already mentioned, known as “mirroring”. One drive will typically be slower than the other to conclude any given write because the write head needs to get into position and wait for the appropriate empty sector to come round, and the write won’t be complete until both drives have finished the action. This means that writing the data to a RAID 1 array takes a fraction longer, but reads may be faster, because data can be delivered from the first drive that finds its head correctly positioned.
The 100 per cent redundancy of RAID 1 is reassuring, but of course halves the amount of data the drives can store. The higher numbered RAID arrays use a compressed form of redundancy called “parity checking“. In maths, “parity” is a test of whether a number is even or odd. There are eight bits to a byte, and each bit can either be 1 or 0. A parity check on a byte would consist of a separate record of whether the number of 1s in this byte was even or odd. As this is just a yes/no question the result could be stored in a single byte as either a 1 or a 0.
 The value of this parity bit is that if the byte gets munged and a single bit goes bad (represented by the question mark in the picture on the left) its correct value can be recalculated. Let’s say the parity bit (to the right of the box representing the byte) here stands for “an even number of 1s”. It’s easy to see from this that the byte needs to be repaired by replacing the question mark with a 1.
Of course if more than a single bit goes wrong this simple scheme is going to fail. But it should be obvious from this that by using more parity bits a robust “bit rot repair” toolkit can be designed without having to mirror all the data, and we owe a perpetual debt to Richard Wesley Hamming, whose pioneering work in the 1950s underpins not only the “R” in RAID but also the fundamental working of individual hard drives.
RAID modes 2 through 6 use a mixture of striping and parity checking, but—largely for reasons discussed in the box out—all except mode 6 have fallen out of favour. RAID 6 will work with a minimum of four drives and, by storing the parity check data redundantly across all the drives, will tolerate a single drive failure with a decent chance of total data recovery.
I could have used RAID 6 with my four WD Red 6TB drives. But although these are probably the most reliable drives of their kind on the market, and specifically designed for NAS use, paradoxically their uniformity is a very good reason not to use them in this mode. All drives will fail at some point, and a bunch of drives from the same batch may well all start to fail around the same time. As I mention in the boxout, the repair cycle is the most vulnerable time for a RAID array, and this is not the time you want a second drive failure.
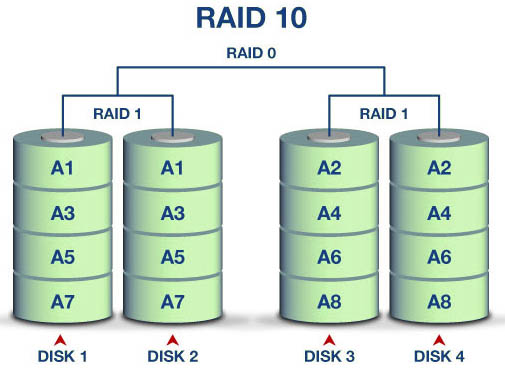 I opted instead for a simpler scheme called RAID 10, which is somewhat wasteful of drive space but balances security and speed rather well, In fact it’s not really a RAID mode at all, being simply a combination of the two pseudo RAID modes, RAID 1 and RAID 0. The four drives operate in two pairs, each pair mirroring its data in RAID 1 mode. The data is then striped across the two pairs in RAID 0 mode. This reduces my potential 24TBs to something like 11TBs, but a single drive failure will keep the data intact. So will a double drive failure, unless the second failure is the pair of the first failed drive. Rebuilding data after a drive replacement should be relatively fast, as no complex parity calculations are needed.
With the drives in place and the latest (as of the time of writing) version of QTS installed it’s high time we moved on to talking about what you can actually do with the QNAP TS-451. We’ll get started with that in the next installment.
Chris Bidmead
The NAS updates have galloped forwards since then, and we’re now on a major update version of the QTS operating system, version 4. Where did you get this information?
Not sure I understand the question, dustzalos. I come by the information because (like all the stuff I write about here) I’m actually using it, and the TS-451’s control panel tells me I’m running version 4.2.0 of the firmware.
—
Chris